In See Through the Matrix, we saw how multiplying RGBA colors by a 4 × 4 matrix can tint, mix, and reorder every color in an image. The same operation is also how digital art tools decide where things go. When you drag, scale, or rotate an item, a matrix multiplication is there.
Location is simpler than color. Instead of four channels, we only have x and y coordinates, so we just need a 2 × 2 matrix. Multiplying it against a point looks like this:

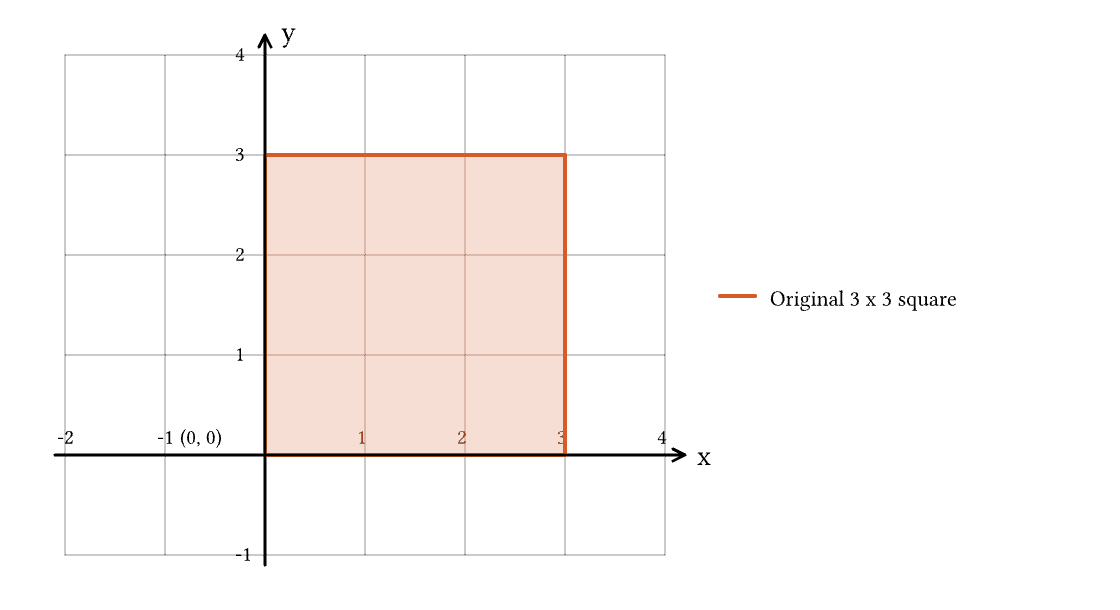
To see how this works, let's work through an example of moving a square around. We start with a 3 × 3 square whose bottom-left corner is at the origin.
Scale
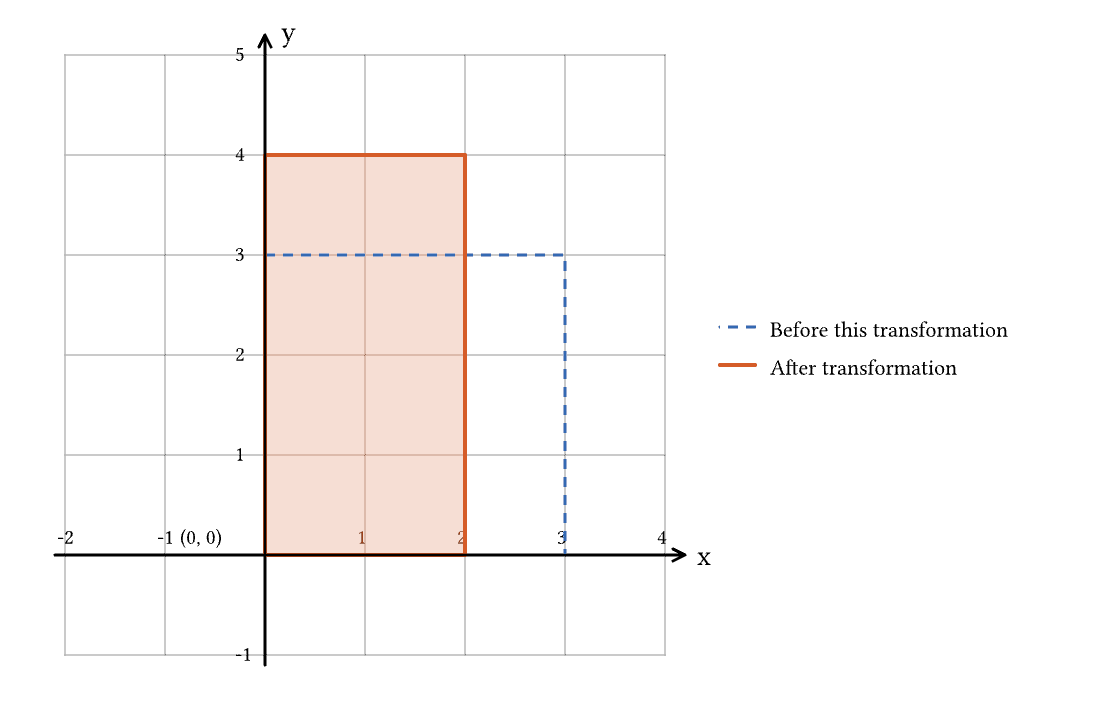
First, let's change the scale to make the square 2 units wide and 4 units tall. To do this, we multiply each x coordinate by 2/3 and each y coordinate by 4/3. These scale factors go on the diagonal of our matrix:

For example, the top-right corner moves from (3, 3) to (2, 4):

Translation
To move the rectangle up and to the right we... Wait, with our current approach there is no way to move something left, right, up, or down. Every entry in a 2 × 2 matrix multiplies x or y, so there is nowhere to put a plain offset. We need something else.
The fix is a mathematical trick called homogeneous coordinates. To perform a translation, we need to add to the x and y components without scaling them. With homogeneous coordinates, we add another dimension, so our x and y become x, y, and z, with z being a throwaway value that is 1. Our matrices become 3 × 3, and the rightmost column is used to add to and subtract from the x and y components. Once done, we simply ignore z and everything works out.
To move our scaled rectangle 2 units to the right and 1 unit up, we put those offsets in the rightmost column:

The bottom-left corner moves from (0, 0) to (2, 1), while the top-right corner moves from (2, 4) to (4, 5):

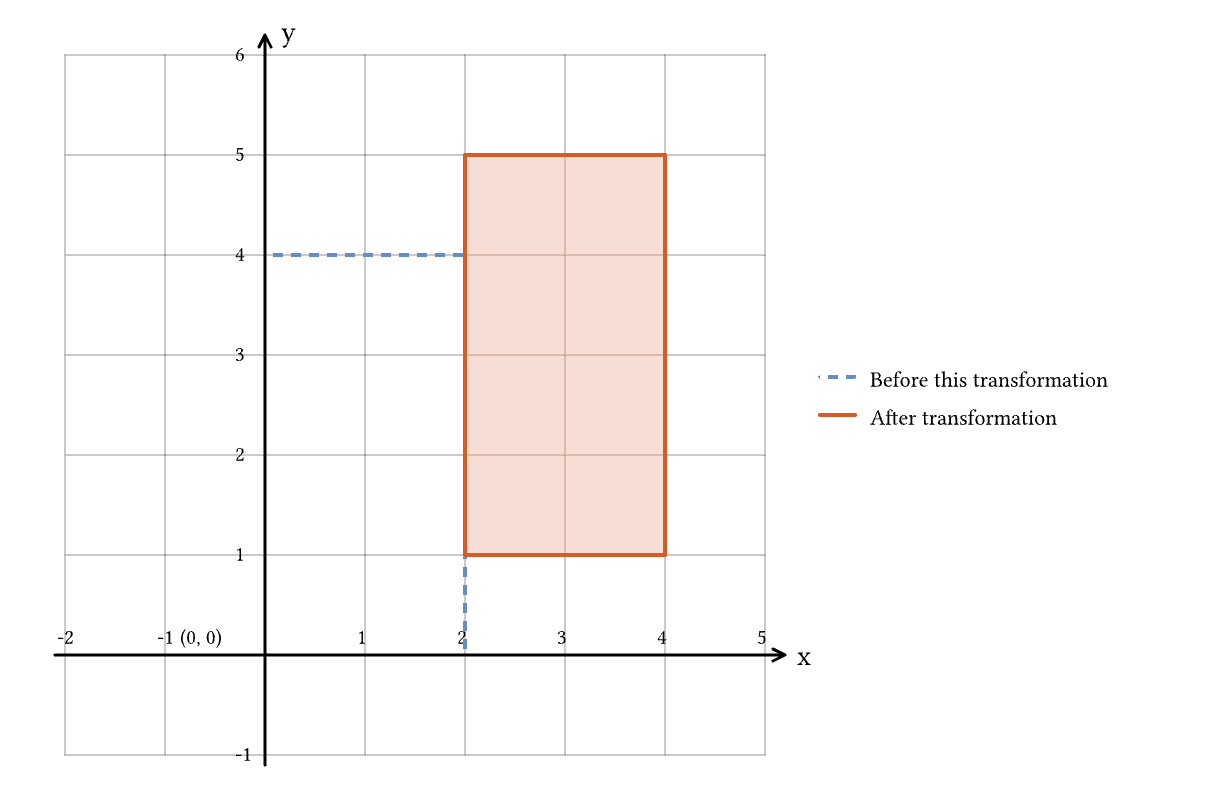
That works: using just the rightmost column, we can move our item without changing its scale or rotation.
Rotation around the center
What if we wanted to rotate the rectangle around its center? Let's try applying a 45° rotation to our translated rectangle. This matrix rotates counterclockwise using trigonometry:

The rectangle's center starts at (3, 3). Applying this matrix moves it:

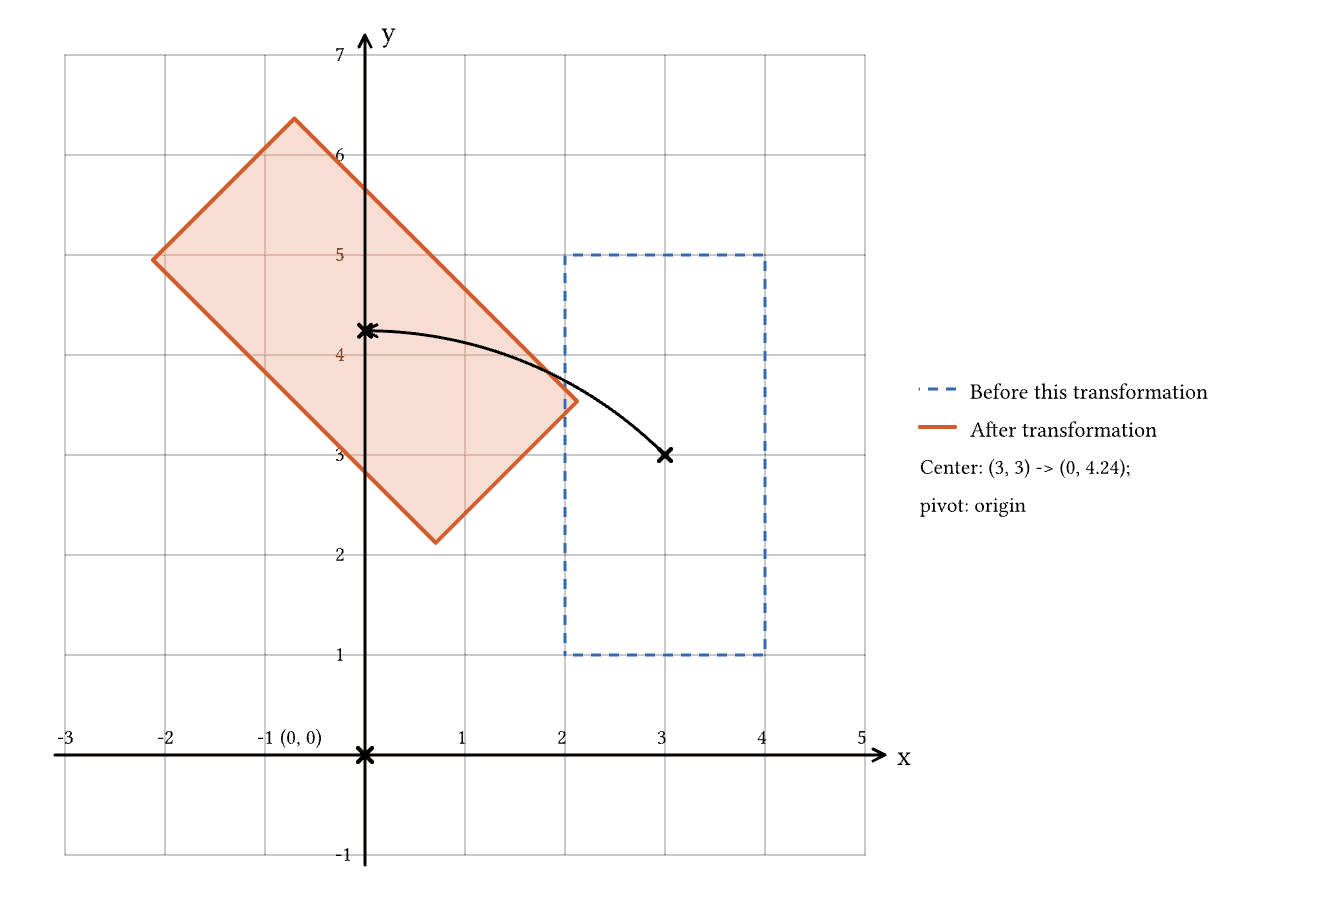
This didn't work! The rectangle swung around the origin of the canvas, because the origin is the point around which rotation happens. The trick to rotating around the center is to move the center to the origin, do the rotation, and then move it back.
Let's return to the scaled 2 × 4 rectangle, before the translation. Its bottom-left corner is at (0, 0) and its center is at (1, 2). To rotate around that center, we apply three transformations in order.
First, move the center to the origin by subtracting 1 from every x coordinate and 2 from every y coordinate:

Next, apply the same 45° counterclockwise rotation as before, now with the rectangle centered at the origin:

Finally, move the center back to (1, 2) by adding the offsets we subtracted:

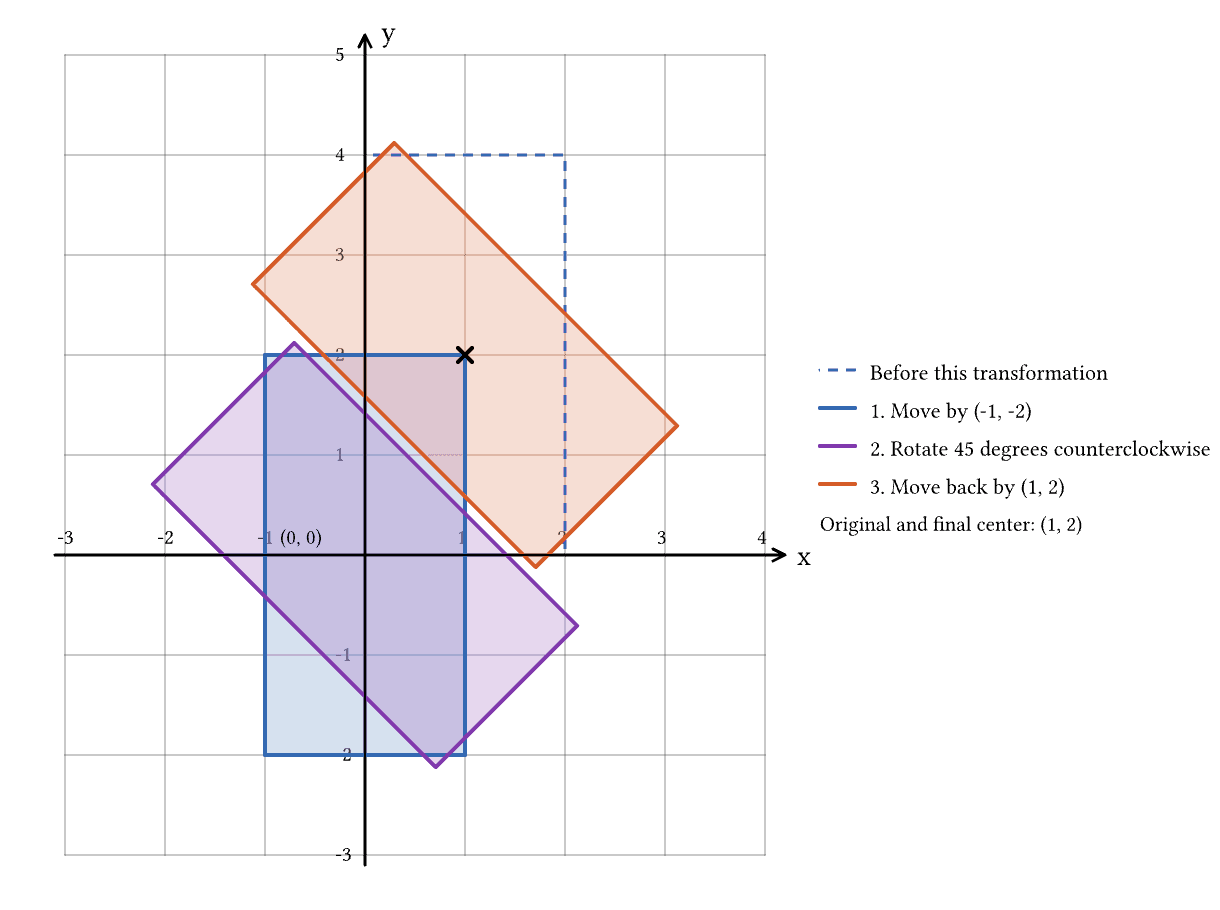
The center follows (1, 2) → (0, 0) → (0, 0) → (1, 2). The combined transformation is T₂ · R · T₁: the matrix on the right acts first.
To see the points actually move, let's follow the bottom-left corner (0, 0) through each step. First, T₁ moves it so the center sits at the origin:

Then R rotates it around the origin:

Finally, T₂ moves it back:

Putting it all together
As with colors, when we multiply all of the matrices together in reverse order and apply the result to our original square, we get the same end result as applying each step one after another. Why matrix composition works walks through the proof. This means that no matter how much you move your objects around, the program has to do the same amount of work.
To get the last result directly from our original 3 × 3 square, combine the scale S with T₁, R, and T₂ from the center rotation:


Rounded to three decimal places, this is:

For example, take the original square's top-right corner (3, 3):

Running (3, 3) through all four matrices one at a time lands on the same point. Applying M once gives the same final rectangle as the full sequence, and the original bottom-left corner (0, 0) maps to (1.707, −0.121), the same position we found by following it step by step.
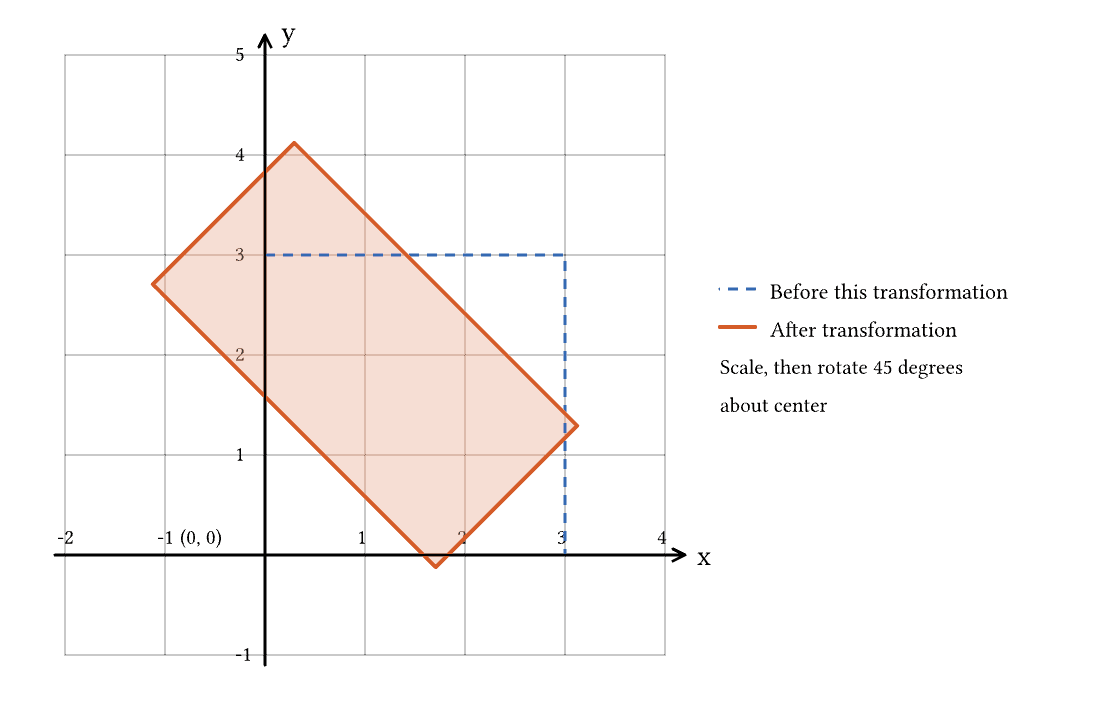
Scaling, moving, and rotating all come down to the same compact operation. However many transformations you stack up, a single 3 × 3 matrix can apply them all at once.
Try it in BrushCue Python
The notebook used to generate these graphs includes the full workflow for scaling, translating, and rotating the rectangle.